Explore our masala idli recipe, featuring a flavorful idli masala and homemade idli podi masala powder. Try the crispy masala idli fry recipe today.
(1) Introduction of Masala Idli Recipe:
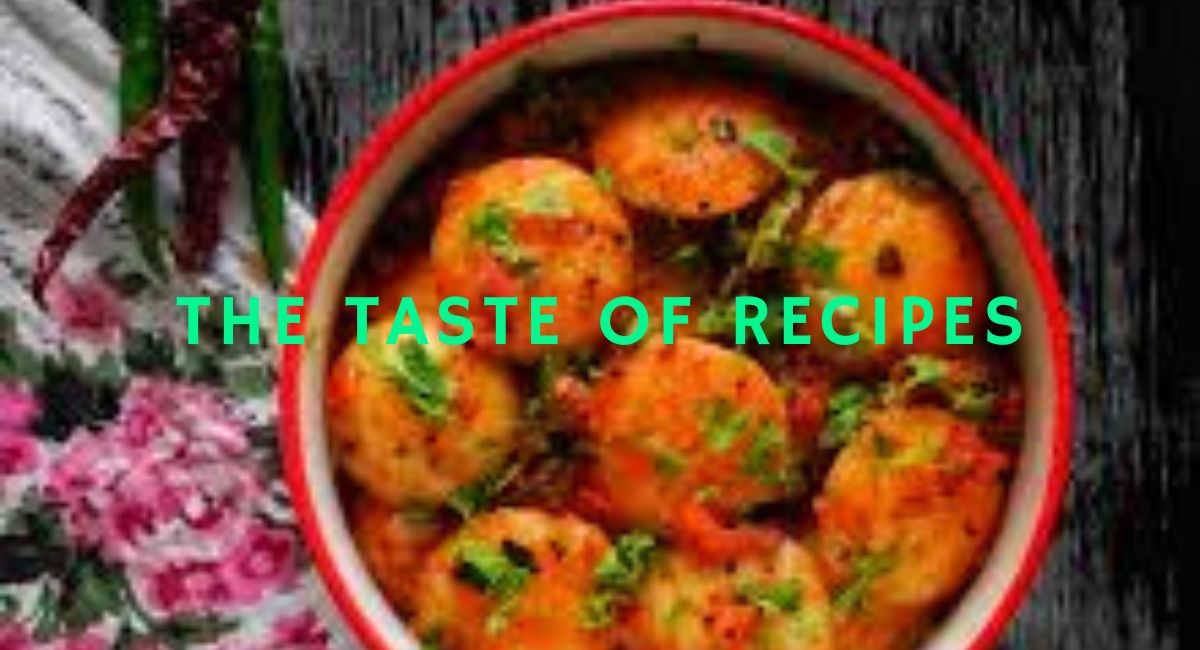
Welcome to the world of masala idli, a delicious twist on a popular South Indian dish! This masala idli recipe improves the conventional idli by infusing vivid spices and tastes, making it ideal for breakfast or snacking.
This article will teach you how to make fluffy idlis with an appealing idli masala recipe, as well as how to make your own idli podi masala powder recipe for an authentic taste.
We’ll also share a fantastic masala idli fry recipe to turn your leftovers into a crispy, mouth-watering delight. Prepare to impress your family and friends with this delicious and gratifying feast.
(2) What is Masala Idli?
-
Definition and background of masala idli.
Masala idli is a flavorful variation of the traditional idli, a popular steamed rice cake originating from South India.
While classic idlis are known for their soft texture and subtle taste, the masala idli recipe brings a delightful twist by incorporating a blend of spices and vegetables.
This transformation not only enhances the flavor but also adds a colorful appeal to the dish, making it a favorite among food lovers.
The foundation of masala idli lies in the idli masala recipe, which typically includes ingredients such as mustard seeds, curry leaves, green chilies, and finely chopped onions.
These ingredients are sautéed and combined with the idli batter, imparting rich flavors that elevate the dish.
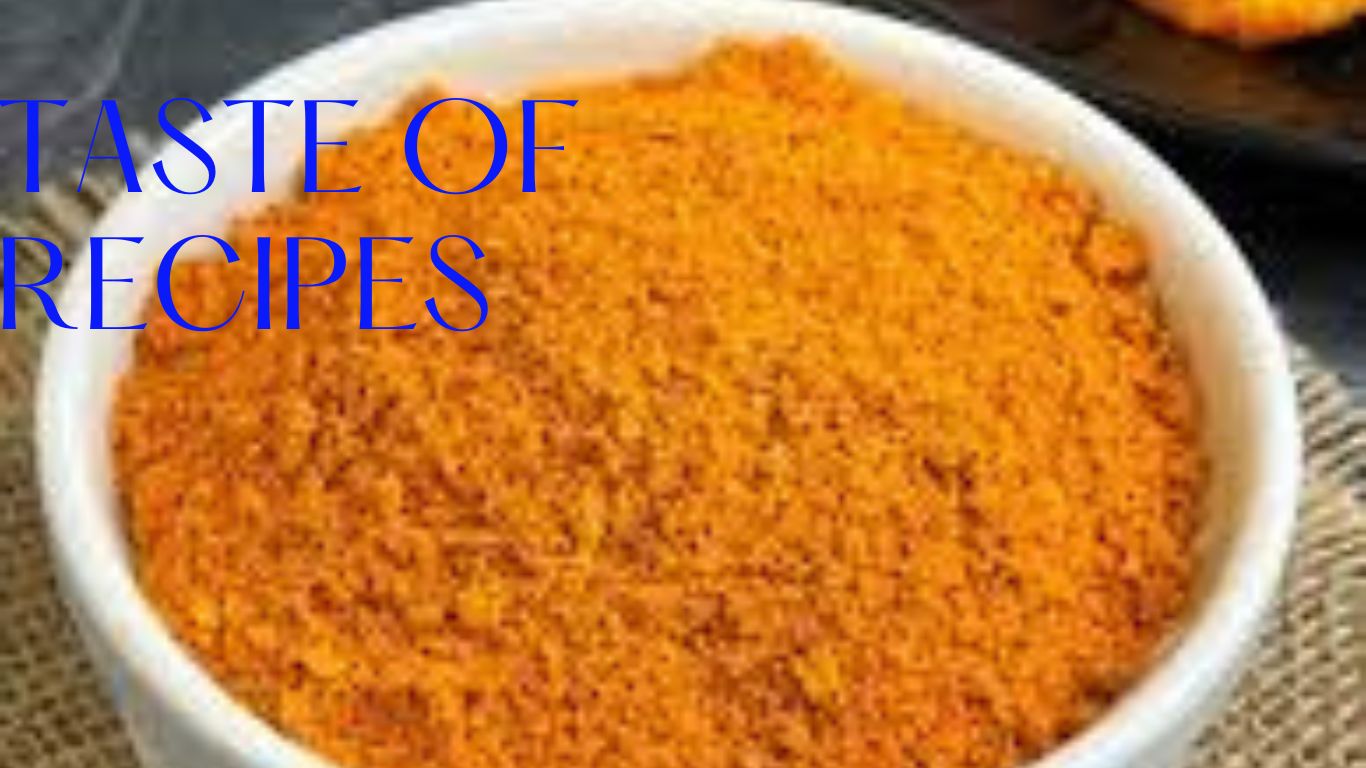
To further enhance your idli experience, many enthusiasts prepare their own idli podi masala powder recipe, a spicy condiment made from roasted lentils and spices.
This powder can be sprinkled atop the idlis or mixed into the batter, adding an extra layer of flavor.For those looking to transform leftover masala idlis into a crispy delight, the masala idli fry recipe provides an excellent solution.
Simply pan-fry the idlis until golden brown for a delicious snack that’s perfect for any time of day.
Masala idli not only showcases the versatility of this beloved dish but also reflects the rich culinary traditions of South India, making it a must-try for anyone eager to explore the vibrant world of Indian cuisine.
-
Comparison with traditional idli.
When comparing masala idli to traditional idli, the differences are both delightful and significant. Traditional idli is made from a simple fermented batter of rice and urad dal (black gram), resulting in soft, fluffy cakes that are often enjoyed with coconut chutney and sambar.
This classic dish is celebrated for its mild flavor and light texture, making it a popular breakfast option across South India.In contrast, the masala idli recipe introduces a medley of spices and ingredients, transforming the plain idli into a vibrant and flavorful dish.
By incorporating an idli masala recipe that includes ingredients like onions, green chilies, and various spices, masala idli offers a savory punch that appeals to those seeking bolder flavors.
The added spices not only enhance the taste but also provide a colorful visual appeal.Another key difference lies in the optional use of idli podi masala powder recipe.
This spicy condiment, made from roasted lentils and spices, can be sprinkled on top of masala idlis, adding an extra layer of flavor that traditional idlis lack.
The versatility of this powder allows for customization, allowing each person to adjust the spice level to their liking.For those who find themselves with leftover masala idlis, the masala idli fry recipe offers a delicious way to repurpose them.
By pan-frying the idlis until crispy, you create a completely new dish that contrasts with the soft texture of the original version.
This method not only adds variety to your meals but also makes the most of your ingredients, minimizing waste.
In summary, while traditional idli is a beloved staple known for its simplicity, masala idli takes it a step further by infusing it with rich spices and flavors, making it an exciting option for both seasoned fans and newcomers to South Indian cuisine.
(3) Ingredients Needed:
-
List of ingredients for the masala idli recipe.
To create the mouth-watering masala idli that brings a flavorful twist to the traditional dish, gather the following ingredients:
- Idli Batter:
- 2 cups of idli rice (or parboiled rice)
- 1 cup of urad dal (black gram)
- 1 teaspoon of fenugreek seeds (optional)
- Water (for soaking and grinding)
- Salt (to taste)
- For the Masala:
- 1 medium onion, finely chopped
- 1-2 green chilies, finely chopped (adjust according to spice preference)
- 1 teaspoon of mustard seeds
- 1 teaspoon of cumin seeds
- 8-10 curry leaves
- 1 tablespoon of oil (for sautéing)
- Fresh coriander leaves, chopped (for garnish)
- For the Idli Podi Masala Powder (optional):
- 1/2 cup of roasted chana dal (Bengal gram)
- 1/4 cup of dried red chilies (adjust for spice)
- 1 teaspoon of sesame seeds
- Salt (to taste)
- 1/2 teaspoon of asafoetida (hing)
- For Masala Idli Fry (if using leftover idlis):
- Leftover masala idlis, cut into halves or quarters
- 2 tablespoons of oil (for frying)
- Additional idli podi masala (for sprinkling, optional)
These ingredients will come together to create a delicious and flavorful masala idli recipe that is sure to please your taste buds.
With the addition of the idli masala recipe and optional idli podi masala powder recipe, you’ll elevate this dish to new heights.
Plus, if you have leftovers, don’t forget to try the masala idli fry recipe for a crispy treat
(4) Step-by-Step Guide to Making Masala Idli
Creating the perfect batter is crucial for a successful masala idli recipe. Follow these detailed instructions to prepare your idli batter, ensuring fluffy and delectable idlis every time:
- Soaking the Ingredients:
- Begin by rinsing 2 cups of idli rice and 1 cup of urad dal (with fenugreek seeds, if using) under cold water until the water runs clear.
- Soak the rice and urad dal separately in ample water for at least 4-6 hours or overnight. This soaking process is essential for fermentation and achieving the right texture.
- Grinding the Batter:
- After soaking, drain the rice and urad dal.
- In a blender or wet grinder, add the soaked urad dal and a little water (about 1/4 cup) to help with grinding. Blend until you achieve a smooth and fluffy batter. The urad dal should be light and airy.
- Transfer the ground urad dal to a large mixing bowl.
- Next, add the soaked idli rice to the grinder, along with a little more water (approximately 1/2 cup). Grind until the rice is coarse but combined. The texture should be slightly grainy, which is ideal for idlis.
- Combining the Batters:
- Add the ground rice mixture to the bowl containing the urad dal batter.
- Mix well, ensuring that both batters are thoroughly combined. The consistency should be thick but pourable. If needed, add a little more water to achieve the desired consistency.
- Fermenting the Batter:
- Add salt to taste (about 1 teaspoon is usually sufficient) and mix well.
- Cover the bowl with a clean cloth or lid and place it in a warm area to ferment for 8-12 hours. The fermentation time may vary depending on the ambient temperature. You’ll know it’s ready when the batter has risen and has a slightly tangy aroma.
- Preparing for Masala Idli:
- Once fermented, gently stir the batter to aerate it. Be careful not to deflate it too much.
- Now, you can proceed to prepare the idli masala by sautéing the onions and spices as outlined in your idli masala recipe.
With your batter ready, you are well on your way to making delicious masala idlis! Remember, this batter can also serve as a base for the idli podi masala powder recipe or even for a crispy masala idli fry recipe if you have leftovers.
Enjoy the delightful flavors and textures of this beloved South Indian dish.
-
Tips for perfect steaming techniques.
Steaming is a crucial step in achieving the fluffy texture of masala idli. Here are some tips to ensure your idlis turn out perfectly every time:
- Use the Right Equipment:
- Invest in a good-quality idli steamer or a multi-tiered steaming device. Make sure the idli molds fit snugly within the steamer for even cooking.
- If you don’t have an idli steamer, you can use a pressure cooker without the weight or any pot with a steaming rack.
- Grease the Molds:
- Before pouring the batter into the idli molds, lightly grease them with oil. This will prevent the idlis from sticking and make it easier to remove them after steaming.
- Fill the Molds Appropriately:
- Pour the prepared batter into the molds, filling them about 3/4 full. This allows enough space for the idlis to rise while cooking without overflowing.
- Steam with Care:
- Bring water to a rolling boil in the steamer or pot before placing the idli molds inside. The steam should be consistent throughout the cooking process.
- Cover the steamer with a lid to trap the steam effectively. If using a pressure cooker, do not place the weight on the lid.
- Timing is Key:
- Steam the idlis for about 10-15 minutes, depending on the size of the molds. To check for doneness, insert a toothpick or knife into the center of an idli; it should come out clean if cooked properly.
- Avoid overcooking, as this can result in dry idlis.
- Let Them Rest:
- Once cooked, allow the idlis to rest for a couple of minutes before removing them from the molds. This helps them firm up slightly and makes them easier to handle.
- Serve Immediately:
- Serve the hot masala idlis immediately with coconut chutney, sambar, or your homemade idli podi masala powder recipe for a delicious accompaniment.
- If you have leftovers, consider using them for a tasty masala idli fry recipe by pan-frying the idlis the next day.
By following these tips, you’ll master the steaming techniques necessary for a perfect masala idli recipe that is soft, fluffy, and bursting with flavor. Enjoy your culinary adventure.
To elevate your masala idli recipe, incorporating the idli masala into the batter is a crucial step that infuses flavor and richness into each bite. Here’s how to do it effectively:
- Prepare the Idli Masala:
- Start by sautéing the ingredients for your idli masala recipe. In a pan, heat 1 tablespoon of oil over medium heat. Add 1 teaspoon of mustard seeds and let them splutter.
- Next, add 8-10 curry leaves, followed by 1 medium onion finely chopped and 1-2 green chilies (adjust according to your spice preference). Sauté until the onions turn translucent and aromatic.
- Cool the Masala:
- Once cooked, remove the pan from heat and allow the sautéed masala to cool slightly. This step is important to prevent cooking the batter when combined.
- Mixing the Masala with the Batter:
- In the bowl containing your prepared idli batter (which should be well-fermented and aerated), gently fold in the sautéed idli masala. Use a spatula to incorporate the masala evenly throughout the batter, being careful not to deflate it too much.
- Ensure the masala is distributed uniformly so each idli is packed with flavor.
- Adjust Consistency if Necessary:
- If the batter seems too thick after adding the masala, you can add a little water (a tablespoon at a time) to achieve the right pouring consistency. Remember, the batter should be thick yet pourable.
- Ready to Steam:
- Once the masala is fully incorporated, proceed to pour the batter into the greased idli molds, filling them about 3/4 full. The addition of the masala not only enhances the taste but also adds visual appeal to your idlis.
- Steaming:
- Follow the steaming techniques outlined earlier to ensure your masala idlis cook perfectly.
Incorporating the idli masala into the batter is what truly transforms your regular idli into a flavorful masala idli.
Enjoy these delicious idlis with coconut chutney or sprinkle some idli podi masala powder recipe on top for an extra kick.
If you have any leftovers, consider trying out the masala idli fry recipe for a crispy and delightful option the next day.
(5) How to Make Idli Podi Masala Powder
-
Step-by-step recipe for making homemade idli podi masala powder.
Creating your own idli podi masala powder is an excellent way to enhance the flavor of your masala idli recipe.
This spicy condiment can be used to elevate the taste of idlis and other dishes. Here’s how to make it at home:Ingredients:
- 1/2 cup roasted chana dal (Bengal gram)
- 1/4 cup dried red chilies (adjust according to spice preference)
- 1 tablespoon sesame seeds
- 1 teaspoon cumin seeds
- 1 teaspoon mustard seeds
- 1/2 teaspoon asafoetida (hing)
- Salt to taste
Instructions:
- Roasting the Ingredients:
- In a dry skillet over medium heat, add 1/2 cup of roasted chana dal. Lightly roast it until it turns golden brown and emits a nutty aroma. Remove from the skillet and set aside to cool.
- In the same skillet, add 1/4 cup of dried red chilies and roast them for a few seconds until they become fragrant. Be careful not to burn them, as this can impart a bitter taste.
- Next, add 1 tablespoon of sesame seeds, 1 teaspoon of cumin seeds, and 1 teaspoon of mustard seeds to the skillet. Roast them for a minute until they start to pop and turn slightly golden.
- Combining the Ingredients:
- Once all the ingredients have cooled, combine the roasted chana dal, red chilies, sesame seeds, cumin seeds, and mustard seeds in a mixing bowl.
- Add 1/2 teaspoon of asafoetida and salt (to taste) to the mixture.
- Grinding the Mixture:
- Transfer the combined ingredients to a spice grinder or a high-powered blender. Grind the mixture into a fine powder. You can adjust the texture based on your preference; some people like a coarser powder while others prefer it fine.
- Taste and adjust the salt if needed.
- Storing the Idli Podi Masala Powder:
- Once ground, allow the podi masala powder to cool completely. Store it in an airtight container in a cool, dry place. It will stay fresh for several weeks.
- Using the Idli Podi Masala Powder:
- To use your homemade idli podi masala, simply sprinkle it over your masala idli before serving or mix it with a little oil to create a dipping paste. This flavorful powder also pairs well with other dishes and can be used as a seasoning for vegetables and snacks.
- Suggested variations and additional spices.
The beauty of making your own idli podi masala powder lies in its versatility. You can customize it to suit your taste preferences or dietary needs.
Here are some suggested variations and additional spices you can incorporate into your idli podi masala powder recipe:
- Spicy Variations:
- Add Black Pepper: For an extra kick, include 1-2 teaspoons of black pepper during the roasting stage. This will elevate the heat and add a unique flavor.
- Curry Leaves: Dry roasted curry leaves can enhance the aroma and taste. Simply add a handful while roasting the other spices.
- Nutty Flavors:
- Peanuts: Incorporate 1/4 cup of roasted peanuts for a richer, nuttier flavor. They provide a delightful crunch and additional protein.
- Cashews: For a creamier texture, you can add 1/4 cup of roasted cashews to the mix before grinding.
- Herbal Touch:
- Dried Mint or Coriander: Add 1 tablespoon of dried mint or coriander leaves to the powder for a refreshing herbal note that complements the idlis beautifully.
- Tangy Twist:
- Tamarind Powder: A pinch of tamarind powder can introduce a tangy flavor that balances the spices nicely. This is especially delicious if you enjoy a hint of sourness in your dishes.
- Flavorful Additions:
- Turmeric Powder: A small amount of turmeric powder (about 1/2 teaspoon) can add a warm color and boost the nutritional value of your podi masala.
- Garlic Powder: For a hint of garlic flavor, consider adding 1 teaspoon of garlic powder. This will give the podi an aromatic, savory depth.
- Texture Variations:
- Coarse Grind: If you prefer a coarser texture, grind the ingredients less finely. This can add an interesting crunch when sprinkled on your masala idli.
- Regional Variations:
- Karnataka Style: For a Karnataka-style podi, you can include coconut by adding 1/4 cup of desiccated coconut during the grinding process. This will give a unique flavor profile.
- Tamil Nadu Style: A Tamil Nadu-style podi often includes roasted fenugreek seeds. Add 1 teaspoon for a distinct flavor.
(6) Masala Idli Fry Recipe
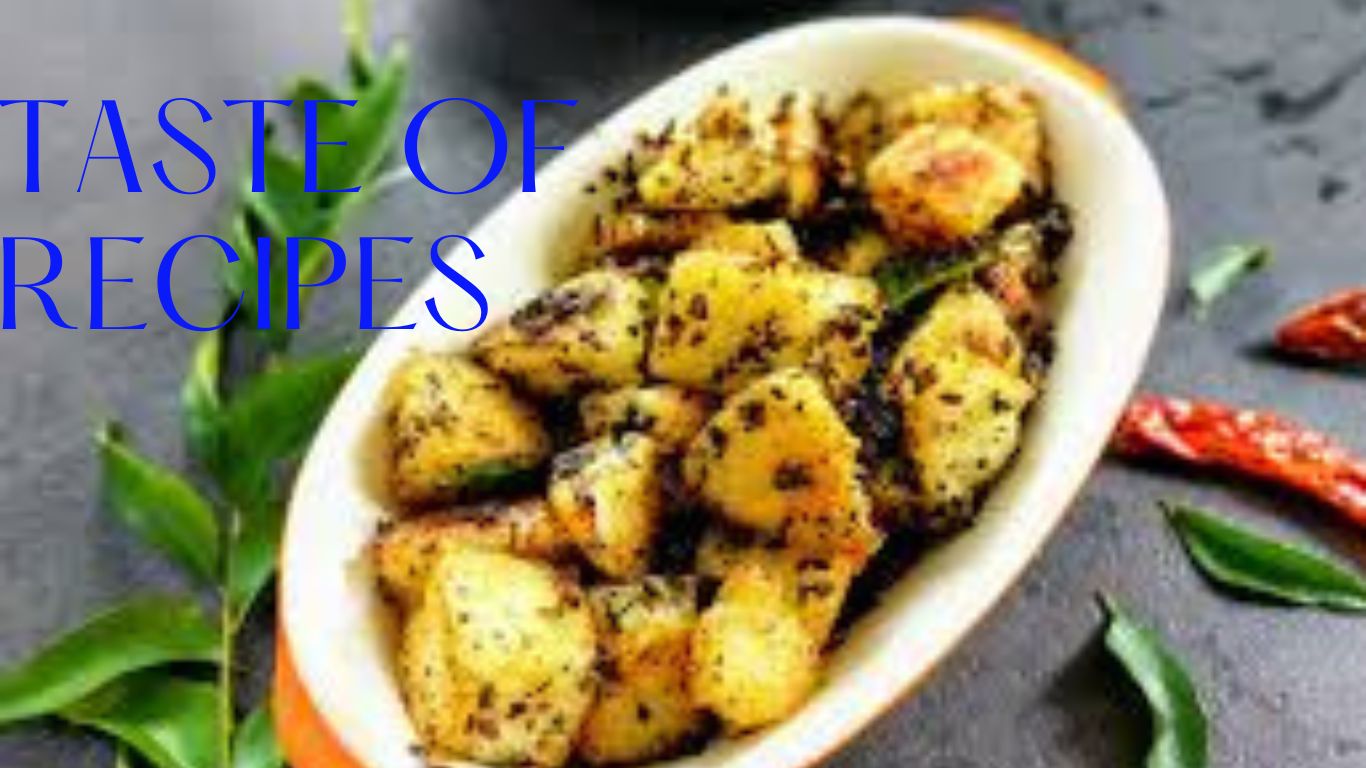
- Instructions for transforming leftover masala idlis into crispy masala idli fry.
Don’t let your leftover masala idlis go to waste! Transform them into a crispy and delicious snack with this simple masala idli fry recipe.
Follow these easy steps to create a delightful dish that’s perfect for any time of day:Ingredients:
- Leftover masala idlis, cut into halves or quarters
- 2 tablespoons of oil (cooking oil of your choice)
- Idli podi masala (optional, for seasoning)
- Fresh coriander leaves, chopped (for garnish)
Instructions:
- Prepare the Idlis:
- Take your leftover masala idlis and cut them into halves or quarters. Smaller pieces will fry more evenly and become crispier.
- Heat the Oil:
- In a non-stick pan or skillet, heat 2 tablespoons of oil over medium heat. Make sure the oil is hot enough but not smoking.
- Fry the Idlis:
- Once the oil is hot, carefully place the cut idli pieces in the pan in a single layer. Avoid overcrowding the pan to ensure even cooking.
- Allow the idli pieces to fry for about 3-4 minutes on one side until they turn golden brown and crispy.
- Flip for Even Cooking:
- Gently flip the idli pieces using a spatula and cook the other side for an additional 3-4 minutes. You want both sides to be evenly crisp and golden.
- Season (Optional):
- If desired, sprinkle some idli podi masala on the frying idli pieces during the last minute of cooking. This adds an extra layer of flavor that complements the crispy texture.
- Drain Excess Oil:
- Once the idli pieces are cooked to your liking, remove them from the pan and place them on a plate lined with paper towels to absorb any excess oil.
- Garnish and Serve:
- Garnish with freshly chopped coriander leaves for added freshness and visual appeal.
- Serve your crispy masala idli fry hot, accompanied by coconut chutney or your favorite dipping sauce for a delightful snack experience.
- Serving suggestions and accompaniments.
When it comes to enjoying your masala idli, the right accompaniments can elevate the experience, making it even more delightful.
Here are some serving suggestions and complementary dishes that pair perfectly with your masala idli recipe:
- Coconut Chutney:
- A classic accompaniment, coconut chutney is made from freshly grated coconut, green chilies, ginger, and tempered with mustard seeds and curry leaves. Its creamy texture and mild flavor balance the spices in the masala idli beautifully.
- Sambar:
- This flavorful lentil soup, known as sambar, is typically served with idlis in South Indian cuisine. Made with a mix of vegetables, tamarind, and spices, it adds a tangy and savory element that complements the idli masala recipe perfectly.
- Idli Podi Masala:
- Sprinkle some homemade idli podi masala powder over your hot masala idlis for an extra punch of flavor. Mixing the podi with a bit of oil can create a dipping paste that enhances the overall taste.
- Pickles:
- Serve with a side of spicy Indian pickles (achaar) for those who enjoy a tangy kick. Mango or lemon pickle pairs particularly well with idlis, adding a burst of flavor.
- Yogurt:
- A small bowl of plain yogurt can be a cooling accompaniment to the spicy masala idlis. The creaminess of yogurt provides a refreshing contrast to the spices and enhances the dish.
- Masala Idli Fry:
- If you have made crispy masala idli fry from leftovers, serve these alongside your fresh idlis. They can be enjoyed as a crunchy snack that adds variety to your meal.
- Fresh Vegetables:
- Serve with a side of fresh vegetable salad, including cucumber, tomato, and onion. This adds a refreshing crunch and balances the meal.
- Chutney Variations:
- Experiment with different chutney varieties such as mint chutney, tomato chutney, or peanut chutney for diverse flavors. Each chutney brings its own unique taste, allowing you to customize your meal.
(7) Serving Suggestions:
- Pairing masala idli with chutneys and sambar.
When it comes to enjoying your masala idli, the right accompaniments can elevate the experience, making it even more delightful.
Here are some serving suggestions and complementary dishes that pair perfectly with your masala idli recipe:
- Coconut Chutney:
- A classic accompaniment, coconut chutney is made from freshly grated coconut, green chilies, ginger, and tempered with mustard seeds and curry leaves. Its creamy texture and mild flavor balance the spices in the masala idli beautifully.
- Sambar:
- This flavorful lentil soup, known as sambar, is typically served with idlis in South Indian cuisine. Made with a mix of vegetables, tamarind, and spices, it adds a tangy and savory element that complements the idli masala recipe perfectly.
- Idli Podi Masala:
- Sprinkle some homemade idli podi masala powder over your hot masala idlis for an extra punch of flavor. Mixing the podi with a bit of oil can create a dipping paste that enhances the overall taste.
- Pickles:
- Serve with a side of spicy Indian pickles (achaar) for those who enjoy a tangy kick. Mango or lemon pickle pairs particularly well with idlis, adding a burst of flavor.
- Yogurt:
- A small bowl of plain yogurt can be a cooling accompaniment to the spicy masala idlis. The creaminess of yogurt provides a refreshing contrast to the spices and enhances the dish.
- Masala Idli Fry:
- If you have made crispy masala idli fry from leftovers, serve these alongside your fresh idlis. They can be enjoyed as a crunchy snack that adds variety to your meal.
- Fresh Vegetables:
- Serve with a side of fresh vegetable salad, including cucumber, tomato, and onion. This adds a refreshing crunch and balances the meal.
- Chutney Variations:
- Experiment with different chutney varieties such as mint chutney, tomato chutney, or peanut chutney for diverse flavors. Each chutney brings its own unique taste, allowing you to customize your meal.
- Creative serving ideas to enhance the dining experience.
Elevate your dining experience with your masala idli by incorporating some creative serving ideas that add flair and excitement to your meal.
Here are some innovative suggestions to make your masala idli recipe stand out:
- Idli Platter:
- Create a visually appealing idli platter by arranging your masala idlis alongside a variety of colorful chutneys and sambar. Use small bowls for different chutneys like coconut, tomato, and mint, and garnish with fresh herbs for a vibrant presentation.
- Idli Stack:
- Stack two or three masala idlis on top of each other and secure them with a skewer or toothpick. Drizzle with melted butter or ghee and sprinkle with idli podi masala powder recipe for an enticing look. Serve with a side of chutney for dipping.
- Idli Tacos:
- Get creative by using masala idlis as a taco base. Cut the idlis into halves or quarters, fill them with sautéed vegetables, and top with a dollop of yogurt and a sprinkle of idli podi masala. This fusion idea adds a fun twist to traditional idli.
- Idli Skewers:
- Thread pieces of masala idli, cherry tomatoes, and bell pepper chunks onto skewers. Brush lightly with oil and grill them for a few minutes until slightly charred. This adds a smoky flavor and makes for an interesting appetizer.
- Mini Idli Burgers:
- Use small masala idlis as burger buns. Fill them with spiced potato filling or your favorite vegetable patty, and top with chutney and fresh greens. This playful take on burgers will impress your guests.
- Masala Idli Chaat:
- Transform your masala idli into a chaat by cutting them into cubes and tossing them with diced onions, tomatoes, green chutney, yogurt, and a sprinkle of chaat masala. This tangy and spicy dish is perfect for a snack or appetizer.
- Layered Idli Bake:
- In a baking dish, layer masala idlis with sautéed vegetables, cheese, and a drizzle of sambar. Bake until the cheese is melted and bubbly for a comforting and hearty dish that’s sure to please.
- Creative Plating:
- Experiment with plating by using different shapes and colors. Serve your masala idli with edible flowers or microgreens for an elegant touch, elevating the visual appeal of your dish.
(8) Tips for Perfect Masala Idlis:
Creating the perfect masala idlis requires attention to detail and the right techniques. Here are some essential tips to help you achieve fluffy, flavorful idlis every time:
- Quality Ingredients:
- Use high-quality idli rice and urad dal for the best texture. The type of rice can affect the fermentation and fluffiness of the idlis.
- Proper Soaking:
- Soak the rice and urad dal for at least 4-6 hours or overnight. This softens the grains and helps in grinding. Ensure that the water used for soaking is clean and fresh.
- Achieving the Right Batter Consistency:
- When grinding, aim for a batter that is thick yet pourable. The urad dal should be fluffy and light, while the rice can be slightly coarse. This combination will yield the ideal texture for idlis.
- Fermentation:
- Fermentation is key to making soft idlis. Keep the batter in a warm place to ferment for 8-12 hours. You’ll know it’s ready when the batter has risen and has a slightly tangy aroma.
- Gentle Mixing:
- After fermentation, gently mix the batter with a spatula to aerate it. Avoid vigorous stirring, as this can deflate the bubbles formed during fermentation, resulting in denser idlis.
- Greasing the Molds:
- Lightly grease the idli molds with oil before filling them with batter. This will prevent sticking and make it easier to remove the idlis after steaming.
- Steaming Techniques:
- Ensure that the water in your steamer or pressure cooker is boiling before placing the idli molds inside. Steam the idlis for about 10-15 minutes, depending on the size. Do not place the weight on the pressure cooker lid if using one.
- Timing and Doneness:
- Check for doneness by inserting a toothpick into the center of an idli; it should come out clean. Avoid overcooking, as this can lead to dry idlis.
- Serving Fresh:
- Serve the idlis immediately after steaming for the best taste and texture. If you have leftovers, store them in an airtight container and consider making masala idli fry the next day for a delicious twist.
- Experiment with Flavors:
- Incorporate your idli masala recipe into the batter for added flavor. You can also sprinkle some idli podi masala powder recipe on top of the idlis for an extra kick.
(9) Conclusion:
In conclusion, the masala idli form not only brings a pleasurable twist to traditional idlis but also offers a awful occasion to explore the rich flavors of South Indian cookery.
By incorporating the idli masala form into your batter, you can produce a dish that’s both sweet and scrumptious.
Pairing your idlis with colorful chutneys and a storming coliseum of sambar enhances the overall dining experience, making it a mess that’s both satisfying and pleasurable.
Do not forget to trial with your own manual idli podi masala greasepaint form for an redundant flavor boost, or transfigure leftover idlis into a crisp and succulent masala idli shindig form.
With the right ways and a bit of creativity, you can master the art of making perfect masala idlis that will impress family and musketeers likewise.
Enjoy the trip of cuisine, and savor each succulent bite of your culinary creation